

How is a Cedar Roof Installed?
- Cedar Roof Coatings
- Sep 28, 2016
- 8 min read
Updated: Jan 21, 2025

There are quite a few material options when it comes to choosing the style of roof you want for your home. Some of the most popular choices used today are asphalt, aluminum and wood. Cedar has become an increasingly popular choice for homeowners, as it adds great curb appeal to your house and has the longevity that you’re looking for in a roof. Yet still many homeowners are baffled on how to install a cedar roof. While this is something that should definitely be left up to the professionals to install, there are a few things you should be aware of before the cedar roofing process begins on your home.
Benefits of Installing a Cedar Roof
Cedar roofs provide more benefits to homeowners than just simply great curb appeal. If you’re unsure if a cedar roof is right for you, here are a few of the major reasons why many people choose to invest in one:
Cedar roofing provides great insulation. Just by replacing your old, worn-out roof with a quality cedar roof, your home will be warmer in winter and cooler in summer because of the fantastic insulating properties of cedar. This will ultimately result in lower heating and air conditioning bills for years to come!
The extra insulation will also buffer out some of the outside noise that enters your home through the roof, making your home quieter in the process.
Cedar is a hard, durable wood that will resist damage from hail, UV rays, insects and other natural elements that could damage other shingle types.
The texture of cedar is relatively uniform and the grain pattern tends to be very straight and fine, creating a streamlined, cohesive look.
Removing Your Old Roof
Once you’ve made the decision to install a new cedar shake roof on your house, one of the first steps in the installation process is removing your old one. Luckily, the same knowledgeable and dependable team you’ve chosen to install your new roof will be the team removing your old one.
After the team removes your old roof, they’ll assess the condition of your sub structure for any damage or possible problems. The roofing professionals will look for things like previous leaking, rotting wood or incorrectly installed components. If they find any issues with your sub structure, these issues will need repaired or replaced before moving on to installing your new roof.

Cedar Shingle Options
Before you can install your cedar roof, you’ll need to make a few decisions about the type of cedar shingles you’re going to have installed on your home. Work with your contractor and answer these few questions to determine which cedar shingle type is right for you.
What type of wood do you want? There are two types of wood used the most when it comes to cedar roofs: Alaskan Yellow Cypress and Western Red Cedar. Alaskan Yellow Cypress is typically the preferred wood choice, because it’s a harder and more durable cedar species. You will likely get more years of use out of this wood choice. Western Red Cedar is still a solid option, however, it tends to be a more delicate species, which might cause it to erode and buckle more quickly.
What type of weathered look interests you? As with any wood, cedar will begin to weather and ultimately, over a period of years, change color. Alaskan Yellow Cypress will eventually fade and turn into a bleached grey color, giving it a somewhat beachy vibe. Western Red Cedar will eventually lose its red tint and turn a darker, almost muddy brown.
What shingle type do you need? The cedar shingles used on your roof are not just simply flat pieces of board nailed to the roof. They are actually angled so that the section underneath the shingle on top of it is thinner than the section visibly seen from the outside of the roof. The part of the shingle visible on the outside is the thickest part of the shingle and known as the butt. The two shingles choices for cedar roofs are perfection and tapersawn. Perfection shingles have a 3/8” butt and tapersawn singles have either a 5/8” or 7/8” butt. Perfection shingles are simply too thin to withstand years of weathering and aren’t recommended for long term use. Tapersawn shingles are the preferred choice for many reputable contractors, and the thicker the better. Just keep in mind that with the extra thickness comes extra cost, so discuss with your contractor which will be necessary for you.
What type of placement do you like? This one is really just up to your personal preference. Shingles can be applied either evenly or staggered and both options will give you an effective, long lasting cedar roof. Look at pictures of each style and let your contractor know which one you prefer before they get started.

Cedar Roof Installation Tips
Once your old roof is removed and you’ve worked through the roof options with your contractor, the process of installing your cedar roof can begin. While cedar roofs are known to last for decades, there are a few things that, if not done properly, can cause your brand new roof to warp and fall apart in just a few short years. Be sure to check with your contractor about these crucial issues before any work begins on the installation of your cedar roof.
When nailing the shingles to your roof, nail placement is key. If the nail is located too high on the shingle, there will be nothing to hold the shingle flat at the exposure line. This could result in your wood shingles, buckling, curling and looking warped. Once a cedar shingle is warped, the only way to fix it is to replace it, which can be costly and time consuming.
Hand nailing each individual shingle to the roof is the only way to go. Yes, it most certainly will take longer than attaching the shingles with a nail gun, but that’s exactly what you want. In order to properly install a cedar roof, slow and steady wins the race! More tension is created on each shingle when hand nailing than with using a nail gun. This tension is necessary to keep your shingles from lifting and curling.
Cedar shingles require stainless steel nails. Coated steel nails or plain steel nails will not work, as they’ll eventually rust and rot. Cedar roofs retain a lot of moisture, which means the nails holding each shingle in place will get wet and stay wet for long periods. Plain steel and coated steel nails will begin to rust over time and the head of the nail could fall off causing the entire shingle to come loose. True stainless steel nails are the only type that will hold up against this type of constant moisture.
Extra Tip: If you live within 15 miles of a body of salt water, you’ll likely need a 316 stainless steel nail for your cedar roof to prevent any possible corrosion of the steel. 316 stainless steel is known as “marine grade”, because it has a greater resistance to corrosion caused by salt water and high heat. If you’re further than 15 miles from salt water, then a regular 304 stainless steel nail will do.
When replacing your roof, you’ll need to replace your flashings too. Some contractors my offer to save you money by reusing your old flashings, but that’s not going to be best for you and your roof in the long run. Flashing keeps water out of your house, especially in areas where your roof, chimney and windows meet the sides of your house. While flashings typically last longer than roof shingles, it likely won’t last the lifetime of two roofs. Therefore, they should be replaced when your new is put in. Plus, if there’s any damage or corrosion on your current flashings, water could seep into your house and create a whole list of other problems for you. Copper is the best choice for flashings, as it lasts longer than any other flashing material.
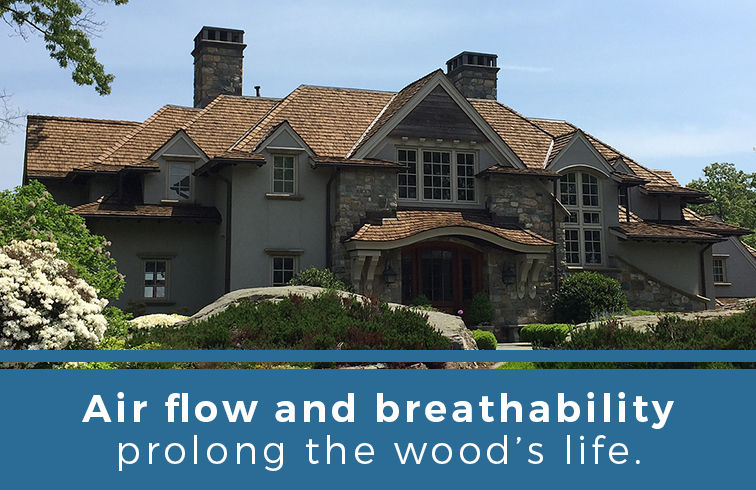
Cedar Needs Room to Breathe
As with any wood, even sturdy cedar, air flow and breathability prolong the wood’s life. Exposure to excess moisture for a long period of time will rot and eventually ruin even the toughest of wood species. Here are the appropriate steps your roofing professional must take to ensure the longevity of your cedar roof.
Appropriate spacing — Shingles should be spaced between 1/4” — 3/8” from each other. This provides enough space to account for any swelling that may occur while the shingles are wet, and gives them the room they need to breath and dry out. If the shingles are too close together, they will swell and press up against each other, cutting off airflow and keeping moisture underneath the roof.
Venting — Venting is also important for the longevity of your cedar roof. Some contractors will add what they call “breathing products” to your roof to allow for venting. While you may think this sounds great, breathing products don’t work particularly well for allowing enough air to get underneath each shingle for ventilation. Proper ventilation of cedar roofs requires a combination of three vital parts: eave venting, skip sheathing and ridge venting.
Eave venting allows air entry at the bottom of the roof.
Skip sheathing allows horizontal ventilation between the actual shingles. Each shingle is nailed directly onto the skip sheathing which has space in it to allow for airflow.
Ridge venting allows the air that comes up through the eave vent a place to escape. Ridge venting is positioned along the top ridge of your roof, allowing for full airflow underneath. This helps keep the underside of the roof the same temperature as the outside. If wood shingles can’t breathe on the inside, they will begin to rot from the inside out, creating a disaster for your roof.
These 3 vital parts are known as a cold roof system because it allows proper ventilation underneath the roof. Plus, it’s designed to handle lots of snow while also providing excellent insulation in the winter months resulting in less heat loss through the roof.

How Long Will It Take?
Cedar roof installation turnaround time will vary depending on the size of your roof and the condition of the old roof that is removed. Roof removal and cleanup is the fastest part of the process, and should only take a day or two. If there are no issues with the roof sub structure, the cedar roof installation process can begin as planned. If any sub structure problems do arise, it could take a few hours to repair minor issues or a few days to repair more significant ones.
Installing cedar roof shingles will take longer than installing regular asphalt shingles, as each shingle will be added by hand. Adding proper ventilation and flashing to your roof are time consuming tasks, and is not something that should be rushed through. It will likely take more than one day to add all shingles to roof, and sometimes can take a few days depending on the size and unique features of your roof.
Most teams can install cedar roofs in a week or less, but sometimes it may take longer than that if other factors (like problems with your sub structure or adverse weather conditions) come onto play. If there is a lot of heavy rain or extreme heat, work on your roof will likely be halted until the weather stabilizes, delaying the roofing process.
At the end of the installation, roofers will always thoroughly check all components to ensure quality craftsmanship and detail. This shouldn’t take a lot of time, but it’s a necessary step to ensure the longevity of your new cedar roof. They will also remove any debris, including components from the previous roof and the new roof installation, leaving your home and yard in the same condition as it was before they arrived.
Cedar Roof Maintenance Tips
Choosing to install a cedar roof can have many benefits to your home for decades to come. In order to increase the longevity of your new cedar roof and get more bang for your buck, you want to be sure you’re doing everything right when it comes to proper roof maintenance. If you’re looking for ways to care for your new roof, check out our helpful tips on cedar roof maintenance so you can keep that beautiful cedar roof in tiptop shape for a very long time!
If you are looking for expert help with maintaining your cedar roof, contact the experts at Cedar Roof Coatings or call us at 203.847.5740.


Comments